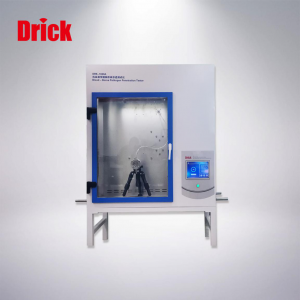
DRK666–Dolomite Dust Clogging Test Machine Operation Manual

Short Description:
General technical support This page records the technical conditions of equipment, you can find the information on the label of the equipment; when you receive the equipment, please fill in the required information in the following blanks. Please refer to this page when you contact the sales department or service department to order parts or obtain information, so that we can respond quickly and accurately to your request. This instrument is a professional instrument, please read this manual...
General technical support
This page records the technical conditions of equipment, you can find the information on the label of the equipment; when you receive the equipment, please fill in the required information in the following blanks. Please refer to this page when you contact the sales department or service department to order parts or obtain information, so that we can respond quickly and accurately to your request.
This instrument is a professional instrument, please read this manual before operation.
① Do not place the instrument in a humid place.
② Please contact qualified service personnel when checking or performing necessary maintenance.
③ Only use a clean soft cotton cloth to clean the instrument, and disconnect the main power of the instrument before cleaning.
④ Only use the provided power cord, and it is forbidden to modify the provided power.
⑤ Only connect the instrument to a main socket with a protective ground.
⑥ The plug and power cord are the power supply equipment of the instrument. To completely disconnect the main power supply of the instrument, unplug the power plug and main power switch.
⑦ The power switch should be positioned in a position that is convenient for users to reach, so that it can be disconnected and pulled out in an emergency.
Warning of Instrument handling !
① When unpacking or moving the equipment, pay special attention to the physical structure and weight of the equipment.
② We recommend proper lifting and handling procedures, and relevant personnel should wear appropriate protective gear, such as safety shoes. If the equipment is to be moved to a longer distance/height, we recommend to choose a suitable handling tool (such as a forklift) for handling.
1. Product introduction
The product is suitable for EN149 test standards: Respiratory protection device-filtered anti-particulate half-mask; Compliant with standards: BS EN149:2001+A1:2009 Respiratory protection device-filtered anti-particulate half-mask required test mark 8.10 blocking test,and EN143 7.13 standard test,etc,
Principle of blocking test: Filter and mask blocking tester are used to test the amount of dust collected on the filter when the airflow through the filter by way of inhalation in a certain dust environment, when a certain respiratory resistance is reached, Test the breathing resistance and filter penetration (penetration) of the sample;
This manual contains operating procedures and safety precautions:please read carefully before installing and operating your instrument to ensure safe use and accurate test results.
Features:
1. Large and colorful touch screen display, humanized touch control, convenient and simple operation;
2. Adopt a breathing simulator that conforms to the sine wave curve of human breathing;
3. The dolomite aerosol duster generates stable dust, fully automatic and continuous feeding;
4. The flow adjustment has the function of automatic tracking compensation, eliminating the influence of external power, air pressure and other external factors;
5. Temperature and humidity adjustment adopts heat saturation temperature and humidity control method to maintain the constancy of temperature and humidity;
Data collection uses the most advanced TSI laser dust particle counter and Siemens differential pressure transmitter; to ensure that the test is true and effective, and the data is more accurate;
2. Safety regulations
2.1 Safe operation
This chapter introduces the parameters of the equipment, please read carefully and understand the relevant precautions before use.
2.2 Emergency stop and power failure
Unplug the power supply in an emergency state, disconnect all power supplies, the instrument will be powered off immediately and the test will stop.
3. Technical parameters
1. Aerosol: DRB 4/15 dolomite;
2. Dust generator: particle size range of 0.1um~10um, mass flow range of 40mg/h~400mg/h;
3. Respirator-built-in humidifier and heater to control exhalation temperature and humidity;
3.1 Displacement of breathing simulator: 2L capacity (adjustable);
3.2 Frequency of breathing simulator: 15 times/min (adjustable);
3.3 Exhaled air temperature from the respirator: 37±2℃;
3.4 Relative humidity of exhaled air from respirator: minimum 95%;
4. Test cabin
4.1 Dimensions: 650mm×650mm×700mm;
4.2 Airflow through the test chamber continuously: 60m3/h, linear velocity 4cm/s;
4.3 Air temperature: 23±2℃;
4.4 Relative humidity of air: 45±15%;
5. Dust concentration: 400±100mg/m3;
6. Dust concentration sampling rate: 2L/min;
7. Respiratory resistance test range: 0-2000pa, accuracy 0.1pa;
8. Head mold: The test head mold is suitable for testing respirators and masks;
9. Power supply: 220V, 50Hz, 1KW;
10. Packaging dimensions (L×W×H): 3600mm×800mm×1800mm;
11. Weight: about 420Kg;
4. Unpacking ,installation and debugging
4.1 Unpacking the instrument
1. When you receive the instrument, please check whether the wooden box of the equipment is damaged during transportation or not; place the wooden box in an open area with a hydraulic forklift, carefully unpack the equipment box, and check whether the equipment is damaged during transportation If there is any damage, please report the damage to the carrier or the company’s customer service department.
2. After the equipment is unpacked, use dry cotton cloth to wipe off the dirt and packaging wood chips in various parts.Transport it to the test site to be installed with a hydraulic truck, and place it on a stable working ground. Pay attention to the weight of the equipment during the transportation process and move it smoothly ;
3. The installation position of the instrument should be determined according to the specific use needs, and the electrical installation should be installed according to the electrical engineering regulations, or installed and grounded according to the electrical circuit parameters provided by the manufacturer.
4.2 Schematic diagram of instrument
4.3 Instrument installation
4.3.1. Instrument installation: After placing the instrument on the designated test site, complete the assembly according to the equipment structure;
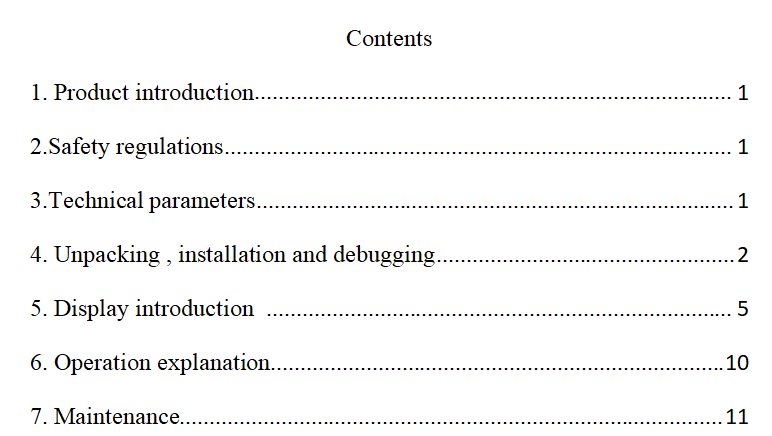
4.3.2. Power supply installation: The laboratory power supply is wired according to the electrical parameters of the equipment, and an independent air switch circuit breaker is installed; the laboratory power cord is not less than 4mm²;
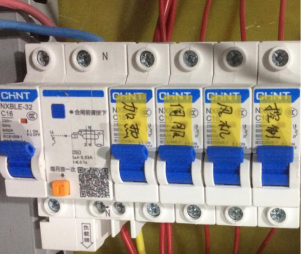
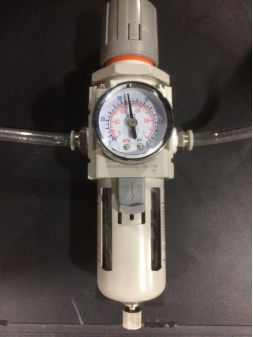
4.3.3 Air source installation: The equipment needs to prepare an air pump (the capacity of the air pump is not less than 120L), the air pipe is connected to the equipment air filter and air pressure gauge; the pressure of the pressure gauge is displayed at about 0.5Mpa (the factory has been adjusted).
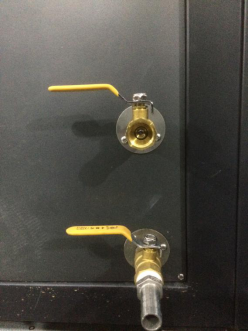
4.3.4 Water tank filling/draining port: the water inlet at the back of the instrument is connected to the tap water pipe with a hose;

4.3.5 Aerosol particle counter installation:
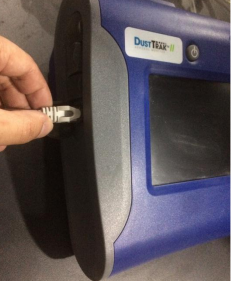
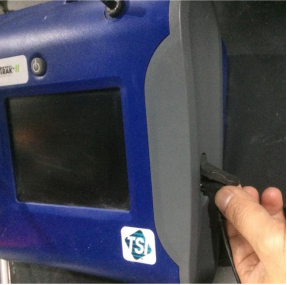
Connect the power cord Connect communication line
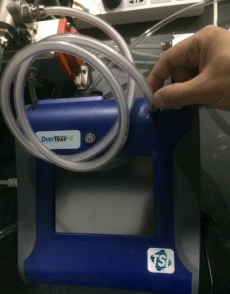
Connect sampling port Installation finished
5. Introduction to the display
5.1 Turn on the power and enter the boot interface;

Boot interface
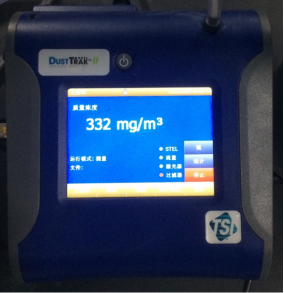
5.2 After booting, automatically enter the test window

5.3 Test window
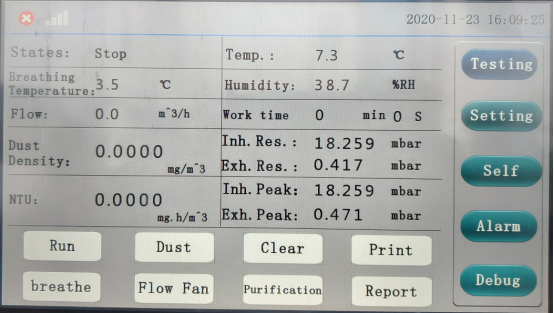
States: The current working status of the instrument;
Breathing temperature: Simulate the breathing temperature of the respirator;
Flow: The flow rate of air flowing through the test chamber during the test;
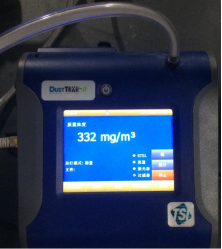
Dust density: The dust concentration of the test chamber during the test;
NTU: Display the current cumulative amount of aerosol dust concentration;
Temp.: The current test environment temperature of the instrument;
Humidity: The current test environment humidity of the instrument;
Work time: Current sample test test time;
Inh. Res.: Inhalation resistance of the sample under the test state;
Exh. Res.: The expiration resistance of the sample under the test state;
Inh. Peak: The maximum inhalation resistance value of the sample during the test;
Exh. Peak: The maximum exhalation resistance value of the sample during the test;
Run: The test conditions meet the test requirements, and the test starts;
Breathe : The simulated respirator breathing is turned on;
Dust: The aerosol duster is working on;
Flow fan: The dust discharge in the test chamber is turned on;
Clear: Clear test data;
Purification: The particle counting sensor is collected and turned on to self-clean;
Print: After the experiment is completed, the test data is printed;
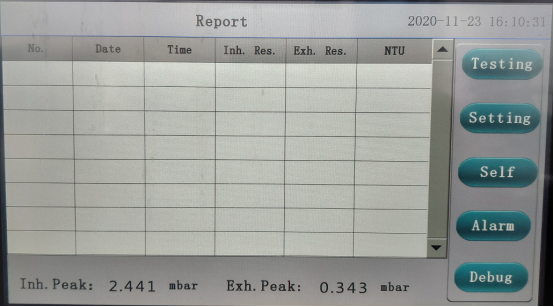
Report: View the test process data, as shown in the figure below;
5.4 Report view: view data during testing;
5.5 Window settings
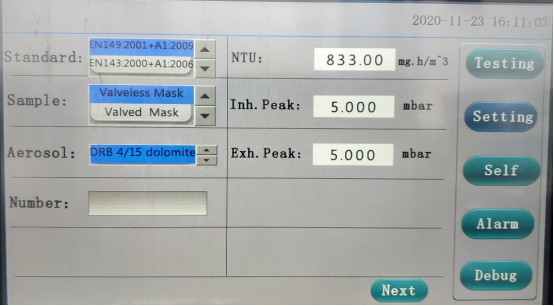
Standard: Settings Test standard selection;
Sample: Types of test sample selection;
Aerosol: Types of aerosol;
Number: Test sample number;
NTU: Set the test dust concentration value (experiment termination condition);
Inh. Peak: FFP1, FFP2, FFP3 mask inhalation resistance (with valve/without valve test termination conditions);
Exh. Peak: FFP1, FFP2, FFP3 mask expiratory resistance (with valve/without valve test termination conditions);
5.6 Set the next page
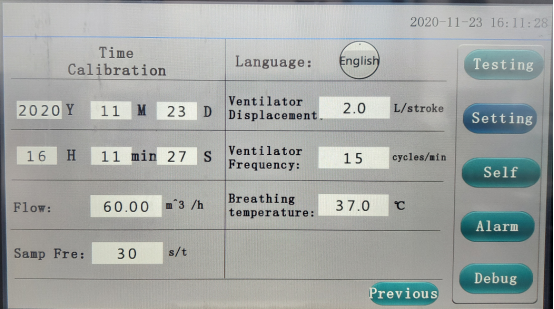
Time Calibration: Date and time setting;
Flow: The dust flow rate setting of the experimental chamber;
Samp fre: Setting the sampling frequency of the dust particle counter;
Language: Chinese and English language selection;
Ventilator displacement: Simulate the displacement setting of the ventilator;
Ventilator frequency: Simulate the setting of respirator breathing rate;
Respiration temperature: Simulate the respiration temperature setting of the respirator;
5.7 Self-check window
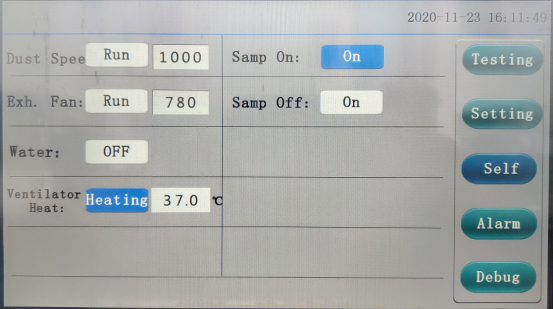
Self-check status-manual control
[Dust speed]: aerosol dust generation is turned on;
[Exh. fan]: The dust exhaust fan of the test chamber is turned on;
[Water]: The water tank device water addition function is turned on;
[Ventilator heat]: The heating function of the simulated ventilator is turned on;
[Samp on]: The particle counter sampling function is turned on;
[Samp off]: The particle counter sampling function is off;
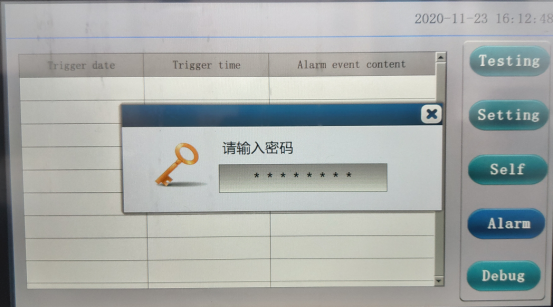
5.8 Alarm window
Fault alarm information prompt!

5.9 Debugging window
The internal data parameter setting of the system, the user needs an authorized password to enter;
6.Operation explanation
Preparation before experiment test:
1. Connect the equipment power supply to the laboratory standard power supply, and the power supply should have a reliable grounding wire and mark;
2. The water filling port on the back of the instrument is connected to the tap water pipe with a hose;
3. Prepare an air pump (capacity no less than 120L), the outlet pressure of the air source is no less than 0.8Mpa; connect the outlet pipe of the air pump to the inlet pressure valve interface of the equipment. Warning! The air supply pipeline of the air pump should not contain too much moisture. It is recommended to install a filter device when necessary to avoid affecting the normal operation of the instrument;
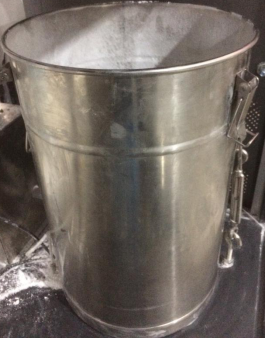
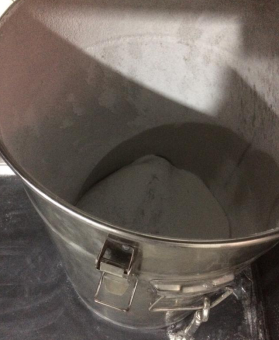
4. Prepare the aerosol (dolomite) before the test, and fill the prepared aerosol into the duster feeding container;
5. Add proper amount of pure water to the humidification tank of the instrument to ensure the stability of temperature and humidity during the test;
Test steps:
6. Turn on the power of the instrument and set the test parameters according to the experimental test requirements; turn on the breathing simulator to adjust the respiratory frequency 15 times/min and the respiratory flow 2L/time;
7. Turn on dust generation, transfer the dust from the distribution room to the dust collection room, and then disperse it into the airflow of 60m³/h in the dust collection room, so that the flow rate is 60m³/h and the line speed is 4cm/s stable display. Manually adjust the dust adjustment knob makes the dust concentration display within the range of about 400±100mg/m³;
8. Install the sample particle filter half mask on the head mold in the dust chamber with an airtight manner to ensure that the sample is worn and sealed completely; install and connect the breathing simulator and humidifier to the sample test head mold, according to the standard Requires test time to run.
9. Inhale air at a speed of 2L/min through the equipped high-efficiency filter to measure the dust concentration in the test room; The test automatically ends and calculates the dust concentration, inhalation resistance, and exhalation resistance according to the collected dust volume, filter flow rate, and collection time.
10. Clogging evaluation
10.1 Exhalation and inspiration resistance: After the test, use clean air to measure the breathing resistance of the particulate filter mask.
10.2 Penetration: Install the sample on the head mold for testing, ensure that the sample does not leak during the test, and test the permeability of the filter
7. Maintenance
1. After the experiment, please turn off dust generation and other operations, and finally turn off the power of the instrument;
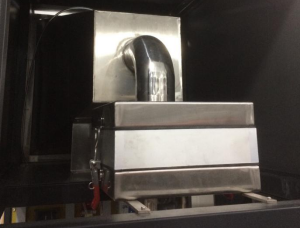
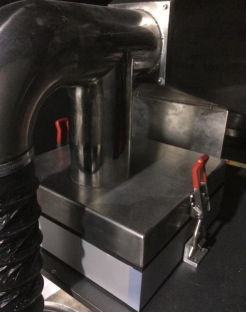
2.After each test is completed, please clean the filter of the particle counting sensor in time;
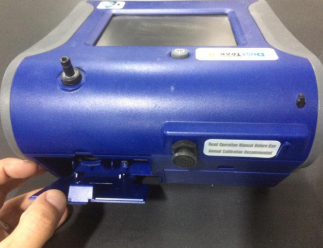
Turn off the power remove the back cover
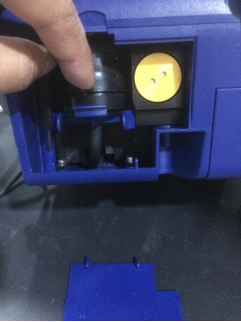
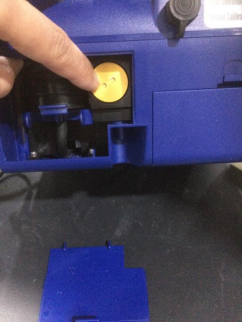
Filteration (1) Filteration (2)
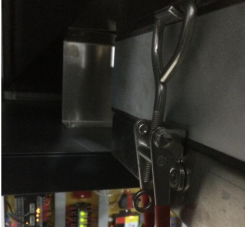
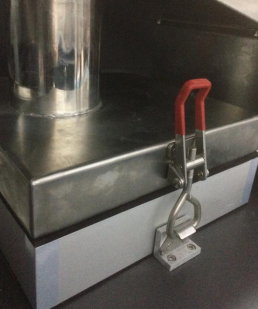
3. After each test, please open the exit door of the test chamber on the right side of the instrument; open the filter to fasten the lock, take out the filter to clean the residual dust on the filter;
 \
\
4. The left side of the instrument is the dust inlet, and the inlet filter should be cleaned regularly and timely;
5.After each test, the filter in the dust generator cylinder should also be cleaned in time
6. Keep the entire instrument clean and don't stack other debris near the equipment;
7. Please fine-tune the dust flow rate and expiratory flow concentration control valve when using it, and it cannot be adjusted too large (it is appropriate to adjust the expiratory concentration to meet the standard required concentration);
Exh. Res.: The expiration resistance of the sample under the test state;
Inh. Peak: The maximum inhalation resistance value of the sample during the test;
Exh. Peak: The maximum exhalation resistance value of the sample during the test;
Run: The test conditions meet the test requirements, and the test starts;
Breathe : The simulated respirator breathing is turned on;
Dust: The aerosol duster is working on;
Flow fan: The dust discharge in the test chamber is turned on;
Clear: Clear test data;
Purification: The particle counting sensor is collected and turned on to self-clean;
Print: After the experiment is completed, the test data is printed;
Report: View the test process data, as shown in the figure below;

SHANDONG DRICK INSTRUMENTS CO.,LTD
Company Profile
Shandong Drick Instruments Co., Ltd, is mainly engaged in the research and development, manufacturing and sales of testing instruments.
The company established in 2004.
Products are used in scientific research units, quality inspection institutions, universities, packaging, paper, printing, rubber and plastics, chemicals, food, pharmaceuticals, textiles, and other industries.
Drick pays attention to talent cultivation and team building, adhering to the development concept of professionalism, dedication.pragmatism, and innovation.
Adhering to the customer-oriented principle, solve the most urgent and practical needs of customers, and provide first-class solutions to customers with high-quality products and advanced technology.